DTU Walk-In Studio

DTU Walk-In Studio
When redesigning and upgrading the studio, we coordinated our vision with the DTU MediaLab team. The goal was to simplify the design to make it easy for anyone to use while delivering very high-quality video content. To optimize the budget, we decided to keep and reuse most of the existing equipment. However, we opted for a new camera with fixed lenses, a more powerful video mixer with a much quieter cooling fan, a new simplified control system, and a ceiling directional microphone for high-quality sound.
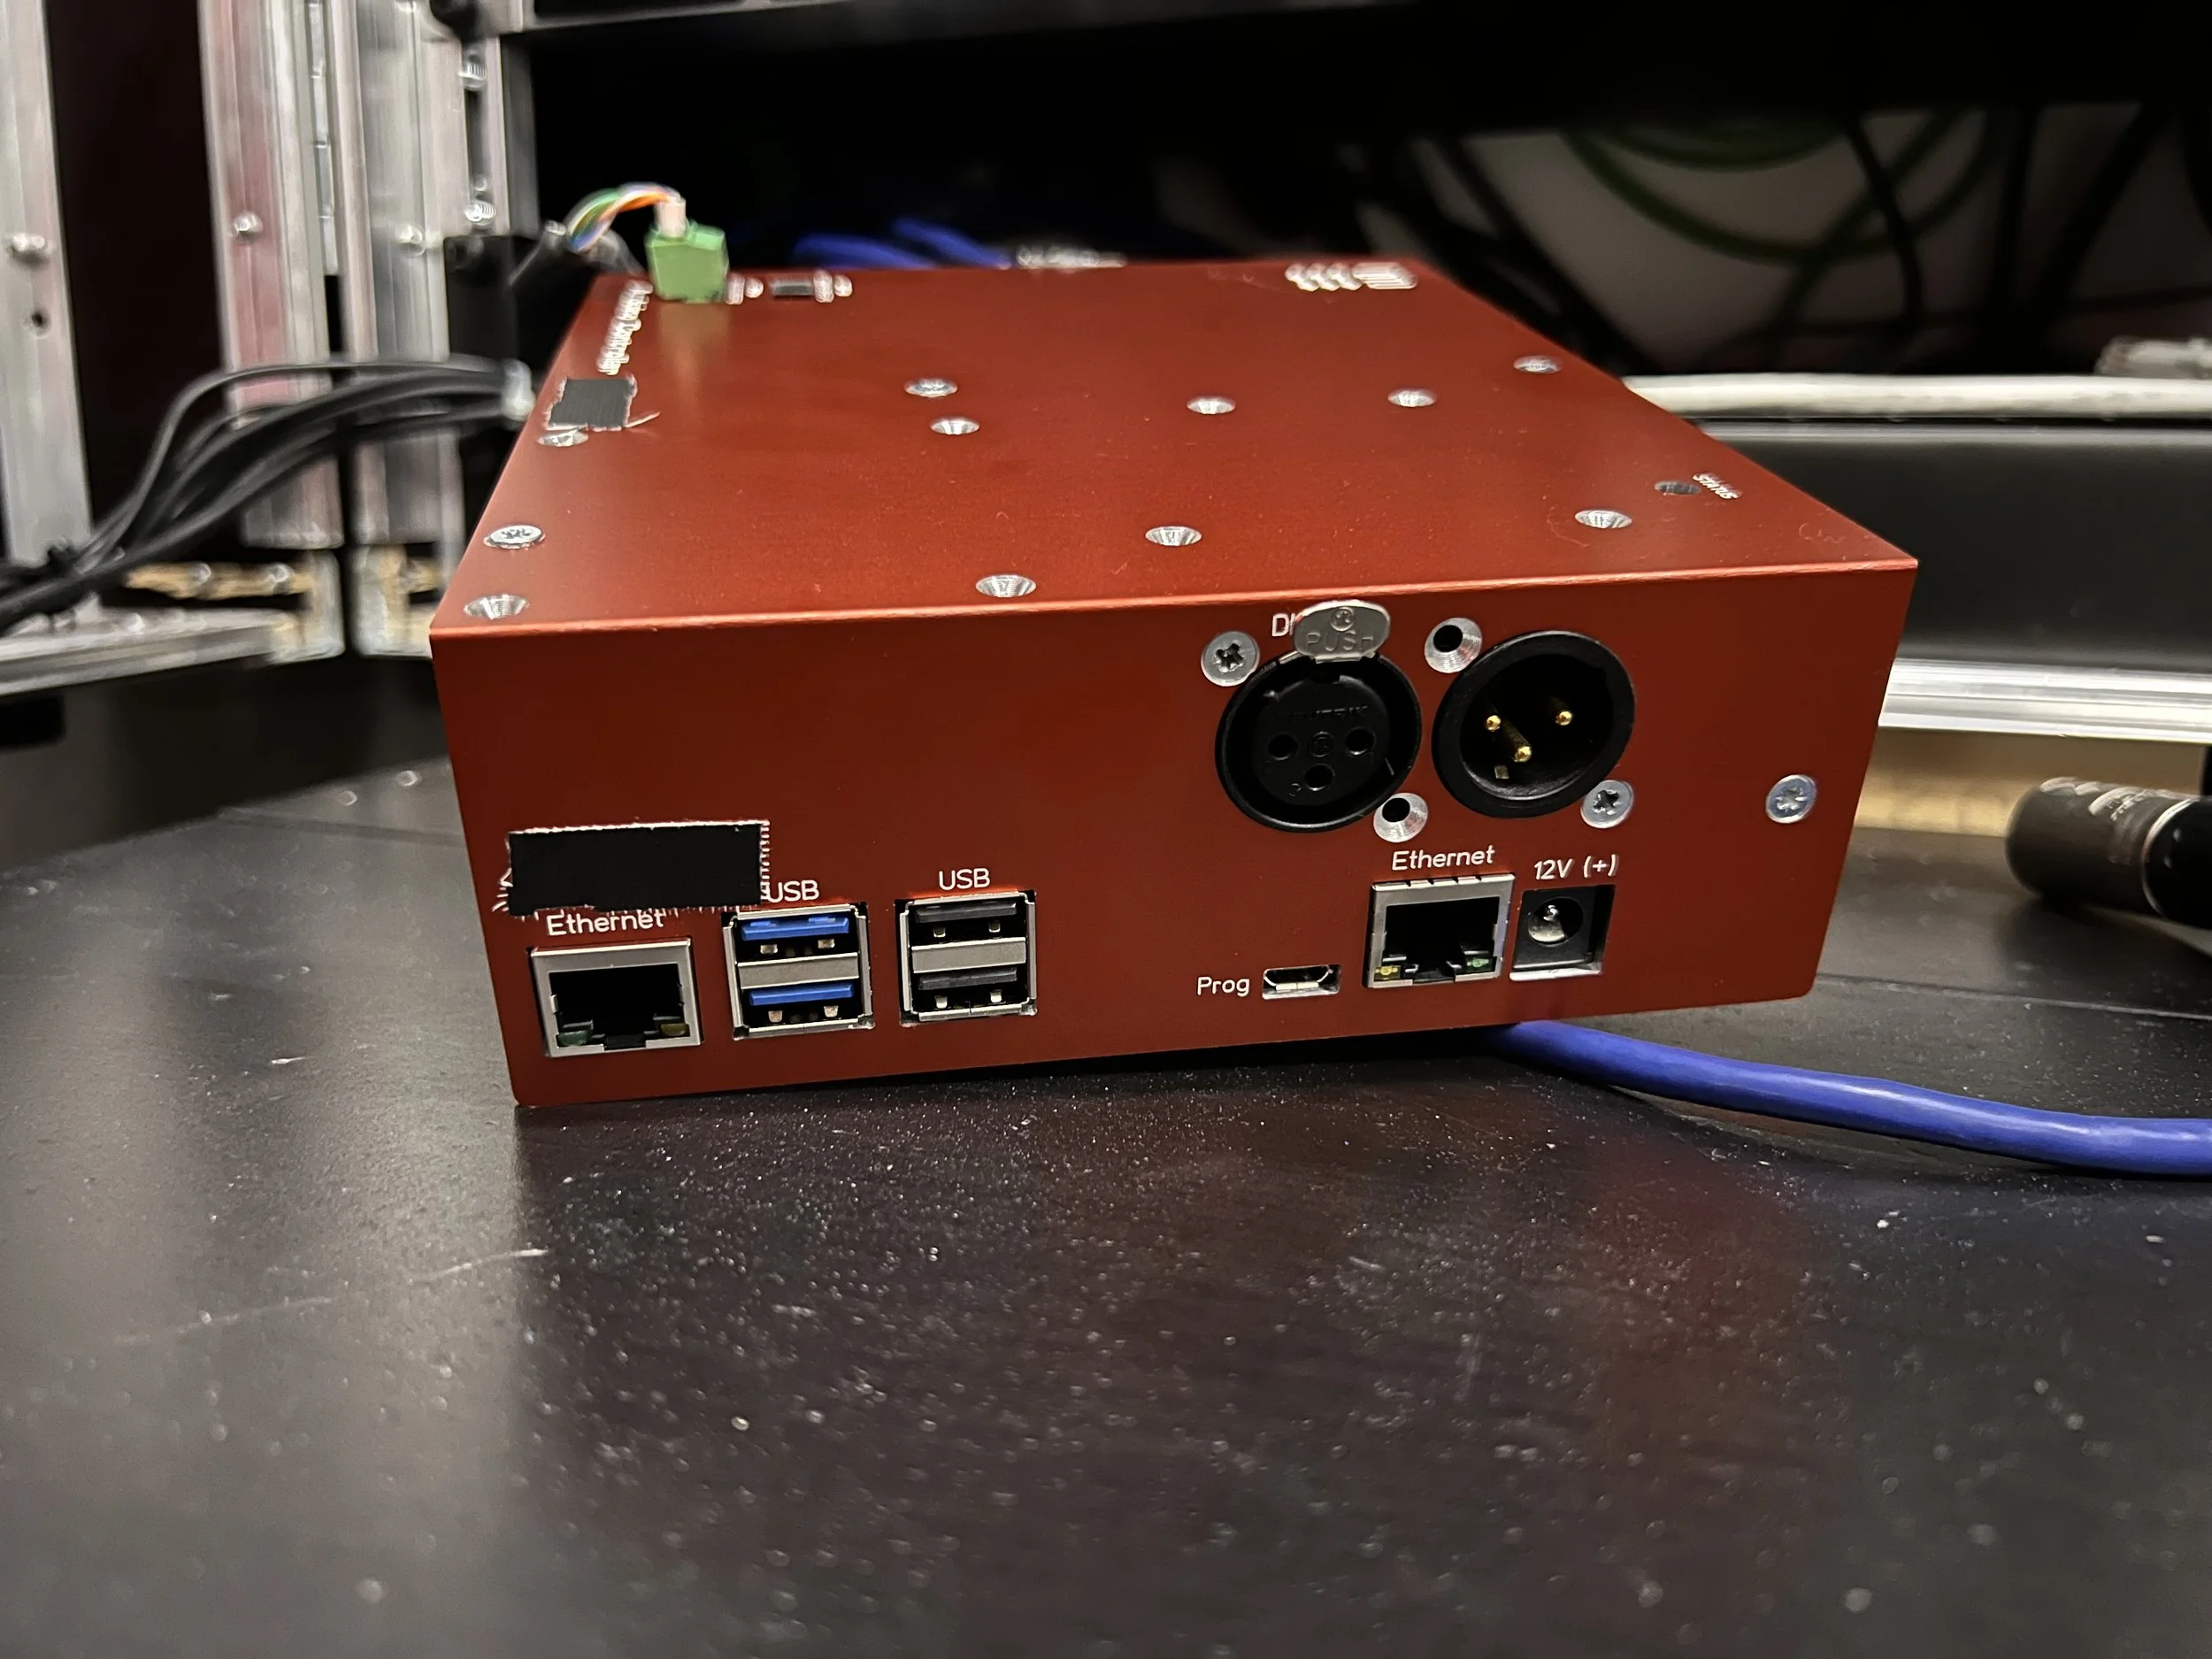
The Arduino and the Raspberry Pi control the whole system
We have programmed an Arduino board to handle all low-level interactions, sensor inputs, remote control, and power management. Once the PIR sensors detect motion in the studio, the Arduino gently ramps up the lighting intensity to a mid-level. A gentle voiceover welcomes the visitors. If the detection is confirmed and further movement is detected, the system boots up; otherwise, it ramps down the light intensity.

A gentle AI voice and a red wallpaper welcome the visitors
The Arduino powers up the video mixer, camera, microphone, TV screen, confidence monitor, and teleprompter, as well as the Raspberry Pi. The screens display a welcome message, while the StreamDeck initially shows the “DTU” logo and then transitions to a welcome message. The Arduino waits until all devices are ready to operate, announcing this by adjusting the lights to the appropriate levels for video recording, along with a voiceover message.

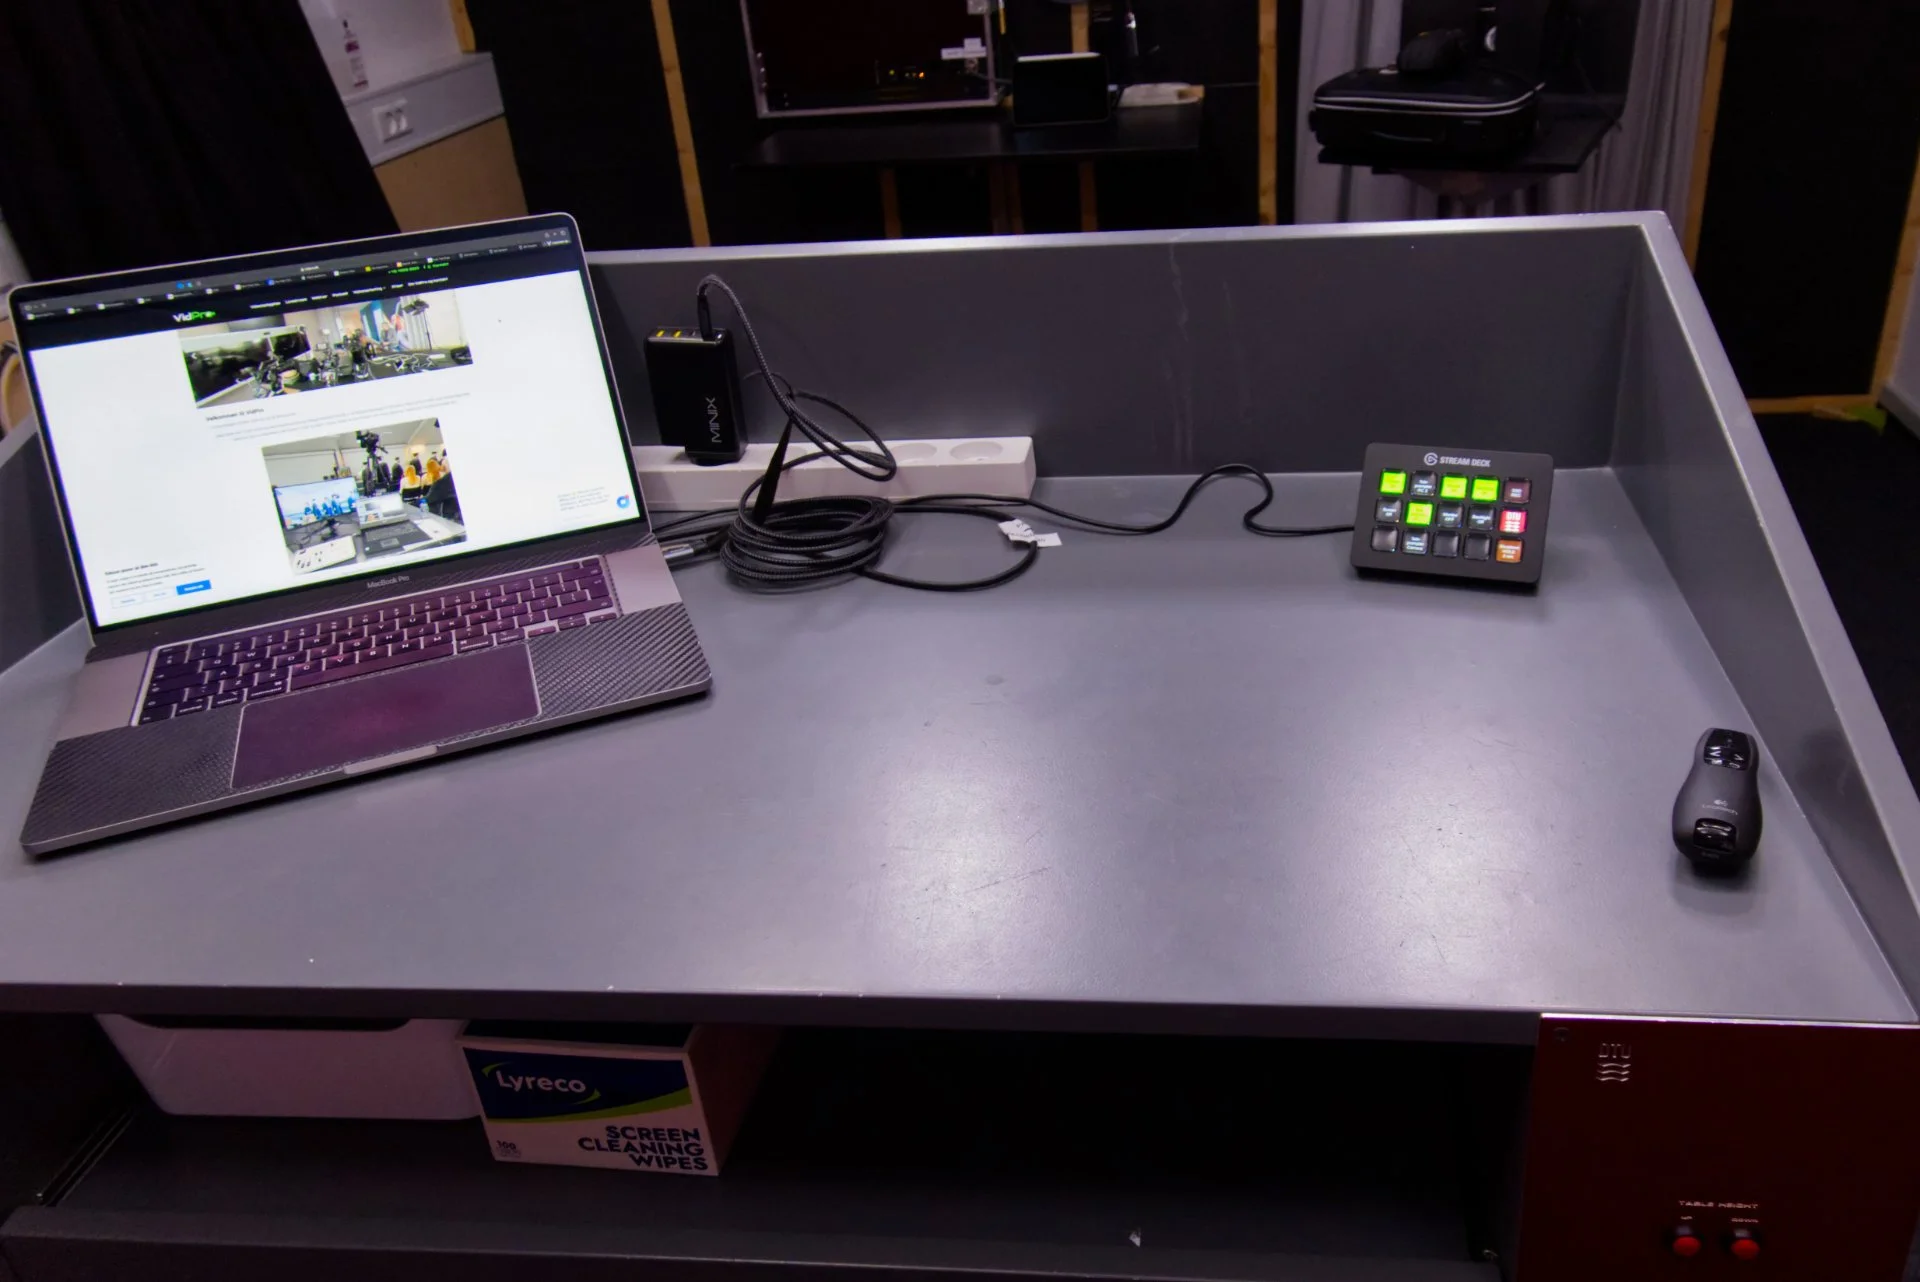
There are so many helpful tools - a teleprompter, a confidence monitor and a VU meter
The control panel allows the user to turn the screen on and off, select sources for the teleprompter, and control the confidence monitor. A discrete VU meter displays the audio levels, providing feedback that audio is being received and recorded. The Raspberry Pi sends commands to the video switcher and the camera accordingly.

Simple solution require state of the art equipment - the ceiling Sennheiser microphone deliver the quality!
We have chosen a Sennheiser ceiling microphone to ensure a problem-free and simple studio experience. The previous iterations utilized lavallière microphones, which sometimes resulted in poor audio quality due to inexperienced users. We eliminated this issue by using a directional zone microphone that captures sound solely from the presenter while rejecting other noises. Additionally, we padded the walls and ceiling with acoustic panels.
To achieve even and smooth lighting while keeping costs low, we utilized the existing lighting fixtures, simplifying the arrangement and installing a large light diffuser. This created a nice uniform lighting effect.
We have installed a Blackmagic Design micro studio camera with a fixed lens on a motorized holder to adjust the height. All converters and cables are hidden behind elegantly designed aluminum panels. On one of the panels, we mounted two buttons to allow the presenter’s table to be lifted or lowered.

Simple control, one USB-C cable to rule them all!
We have integrated the video signal, audio, and HDMI output for slide-deck presentations into a single USB-C cable. As DTU uses Panopto for video lectures, we recommend it for recordings and distribution. However, we have also installed a USB port that allows recording to an external SSD drive for later video editing.

Do not disturb if the sign is on!
A "Recording" sign is displayed outside the studio to signal when someone is recording, preventing interruptions. A system of rails and curtains allows for different backgrounds; the curtains can be drawn behind and in front of the screen according to needs and come in three distinct colors. These curtains are part of the studio's first iteration.

Key yourself in a different dimension - green screen for outstanding results
Additionally, a simple roll-off green screen can be extended behind the talent. The table is equipped with wheels, allowing for almost free movement, constrained only by the length of the multi-cable. All the equipment is hidden inside the rack.

Easy control at your fingertips!
Once the talent finishes their presentation, they can shut down the system by pressing a button. The voiceover announces that the system will shut down automatically and that the lights will turn off once the talent exits the studio. If they want to start a new session, they can simply press the “Start” button without needing to exit.
When the talent leaves the studio and the PIR sensors detect no motion, the Arduino shuts down the power to the Raspberry Pi and dims the lights. If the talent does not manually shut down the system, the Arduino will detect the inactivity and will shut down the system after a predetermined period of time.
We have been tasked with updating the studio in January 2025. The DTU team has gathered feedback from users and identified potential improvements in the design. We have implemented an extra feature in the menu that allows users to adjust the height of the camera and the screen with the simple press of a button. This has been achieved by installing precise distance sensors, updating the Arduino code, and implementing an easy-to-understand control menu on the StreamDeck. The system allows for synchronous repositioning of both the camera and the screen to predefined heights.
George has been involved in the initial design and development of the Walk-In studio back in 2014-2015, collaborating with the then “LearningLab” team from DTU. He has supported the studio over the years and has consulted the AV team for the second iteration.
Follow the link to the official DTU website: https://www.bibliotek.dtu.dk/en/use-the-library/dtu-media-lab/self-service/walk-in-video-studio
And don’t forget to check the gallery.